Pages

Monday, December 12, 2011

Breakfast? Desert? Who cares, Let's just eat it!

Ok, first I have to say, I absolutely LOVE Katie's yummies!  OMG'sh, so so good!  Today's breakfast was stolen 100% from her!  I added my own touches and substitutes (no surprise there) but it is all her!

This, scrumptious looking thing, is all Katie's idea, now I must make it lots!
This is a Gluten Free Vegan Peach Cobbler with vanilla "yogurt/pudding".  On it's own, the yogurt is not very good. (I call it yogurt since I added 2 probiotic capsules and honey and let it sit overnight.  Not sure if it really does anything but I like to think it does SOMETHING! lol)  I need to play with it a bit to figure out a good vanilla flavoring.  Since I was making it to go with the cobbler specifically, I didn't wanna add strawberries or anything and I thought peach would bee to much.  But when you mix the 2 together, YUM-MY!  DD2 tasted the yogurt by itself and said, eww mom!  I waited all night for THIS!  I said mix it with the cobbler.  I hear YUMMMMMMM!  This is really GOOOOOD!  Yep, I love Katie!

"Peach Cobbler "
(Serves 3 kids )
  • 5 cups frozen peaches
  • 1 T arrowroot (or cornstarch)
  • 1/2 tsp cinnamon
  • 1-1/2 cup rice chex
  • 1/2 cup sugar
  • 2 T melted margarine (I used Earth Balance. If you want a fat-free crisp, double the applesauce and omit the margarine.)
  • 2 T applesauce (For a more buttery taste, replace this with an extra T of the margarine)
  • 1/2 tsp salt
Preheat oven to 350F. Mix the peaches, arrowroot, cinnamon, 1/2 the salt, and 1/2 the sweetener in a bowl. Let sit for ten minutes. Meanwhile, stir the crushed cereal, remaining sweetener, remaining salt, melted margarine or oil, and applesauce in a bowl until well-blended. Spread the peach mixture in a small baking pan and top with the cereal mixture. Bake for 45 minutes.

** You can use fresh peaches, just add 1TB lemon juice.

Katie's recipe doesn't use sugar, it uses replacements and she has a sugar free option as well if you want to check it out.  We however, love sugar lol


For the yogurt/pudding, again, Katie has a quick one.  It uses Agar flakes.  Since I only have Agar powder, I agian made adjustments. I have to double all of Katie's recipes cuz frankly, 3 kids eat a lot. So here is what I did:

Vanilla Pudding/Yogurt

  • 5 1/2 cups Almond Milk (I just used store bought)
  • 2 tsp. Agar PowderThen I mix
1. Mix both in a pot and let stand about 5 minutes
2. Slowly bring to a boil then remove from heat and let cool
3. When cooled, put in fridge until completely gelled.
4. Put in blender and add whatever flavor you want. 

From here, I added in about 1 TB vanilla extract, 2 TB honey and 2 capsules of allergy free probiotics and mix in the Vitamix.  When I tasted it, didn't taste very good so I added more vanilla and kept adding to taste.

I put it in the fridge over night, and in the morning, I heated the Cobbler and scooped some of this on it, and YUM-MMO!

Sunday, December 4, 2011

Gluten free Vegan 3D Fire truck cake

DS2 had his 3rd birthday while I was with my mother so I missed his birthday.  Horrible for me, for him, he had no clue.  Didn't bother him a bit.  DD3's birthday was in November, so, since neither are in school yet, I had a double party for them.  Which, turns out, didn't happen either because of the weather, then Thanksgiving was here, so we just celebrated it on Thanksgiving.

We did do themes though, DS2 wanted fire trucks, goes well with his Halloween fireman costume, and DD3 wanted to Strawberry shortcake.  I found  new recipe for a cake recipe, and it really didn't yield what I thought it would, even doubled, but since the party was cancelled, it was perfect for just the family and in laws.
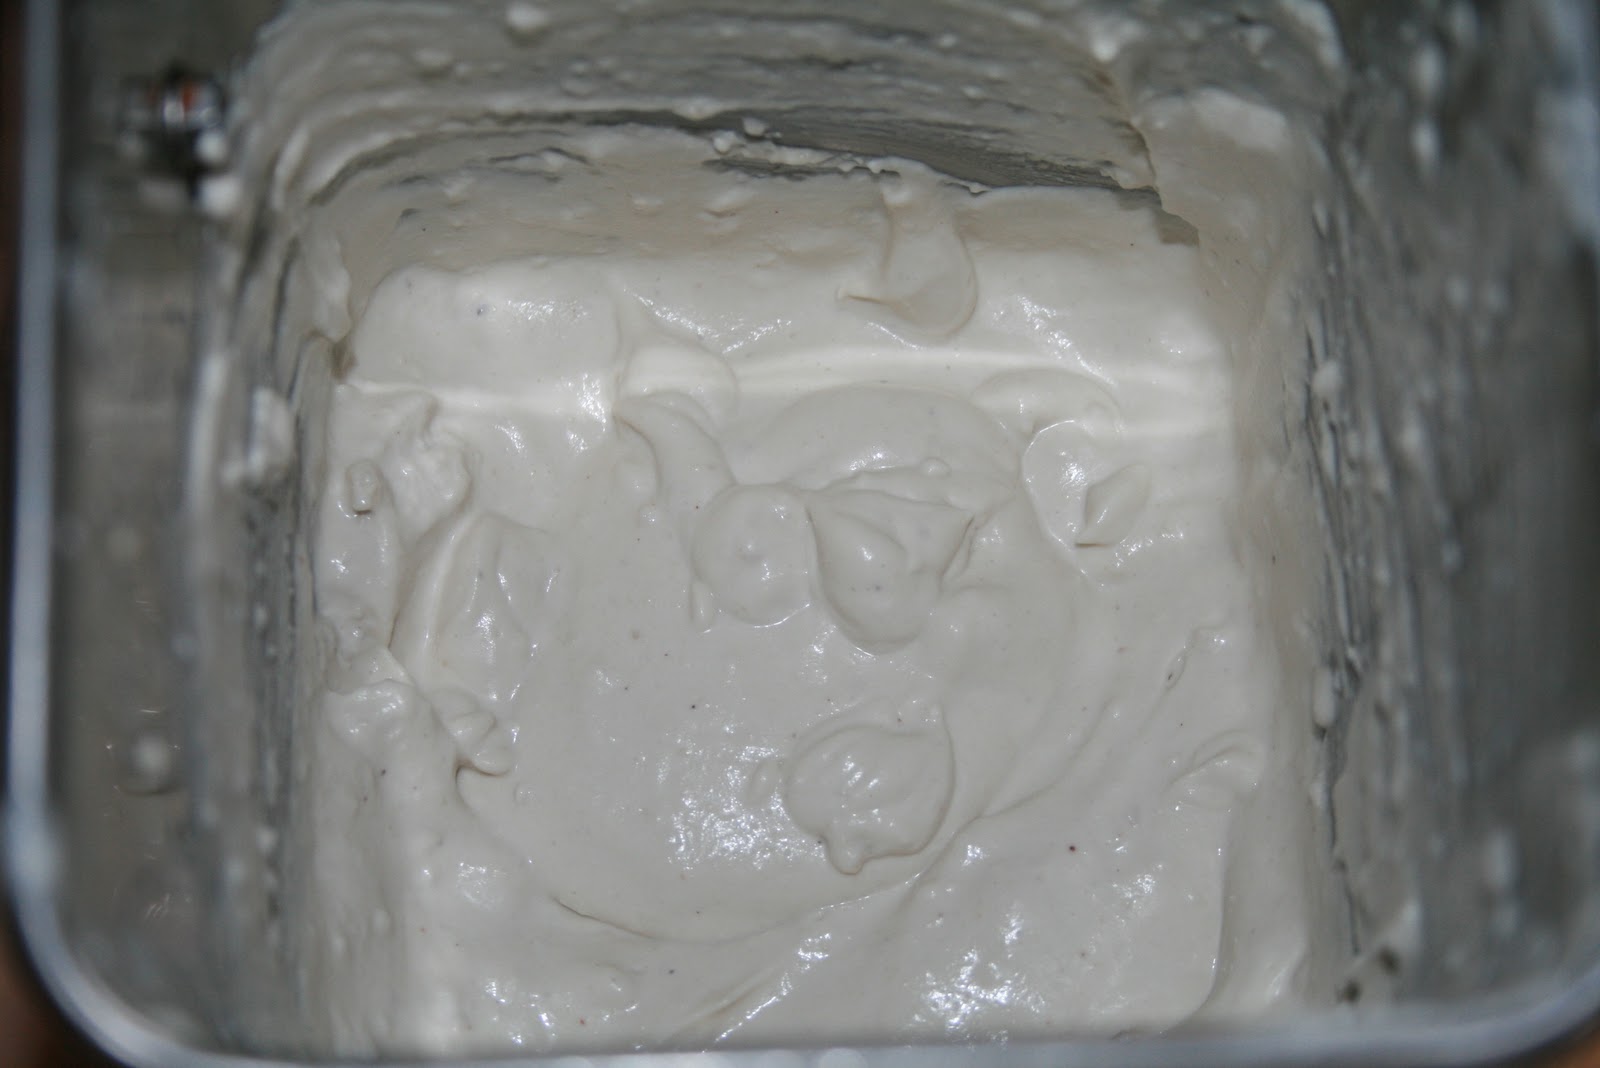
I found the cake recipe by accident, it was WONDERFUL!  even after almost a week of being frozen, thawed, frozen, thawed, frozen and thawed again, it was delicious!  Here's the recipe (linked above):

Simple White Cake
makes 12 cupcakes, double the recipe for a sheet cake
Ingredients:
  • 1 cup granulated sugar
  • 1 cup sweet white sorghum flour
  • 1/4 cup tapioca flour
  • 1/4 cup cornstarch
  • 1 tsp xanthan gum
  • 1/2 tsp salt
  • 1 tsp baking powder
  • 3/4 cup melted Earth Balance
  • 1/2 cup non-dairy milk
  • 3 tbsp vinegar
Directions:
Preheat oven to 350 degrees and prepare cupcake pans by adding cupcake liners or by greasing and lightly flouring. If making a sheet cake, lightly grease and flour the entire pan.
Mix together sugar, sorghum flour, tapioca flour, cornstarch, xanthan gum, baking powder and salt until well blended.
Combine non-dairy milk and melted Earth Balance and slowly stir into flour mix until a thick batter is formed. Add vinegar one tablespoon at a time, stirring in between.
Drop batter by large spoonfuls into prepared cupcake pans, or pour into prepared cake pan/s.  Bake at 350 degrees for about 27-30 minutes, or until knife inserted into center comes out clean (a sheet cake may take a bit longer).

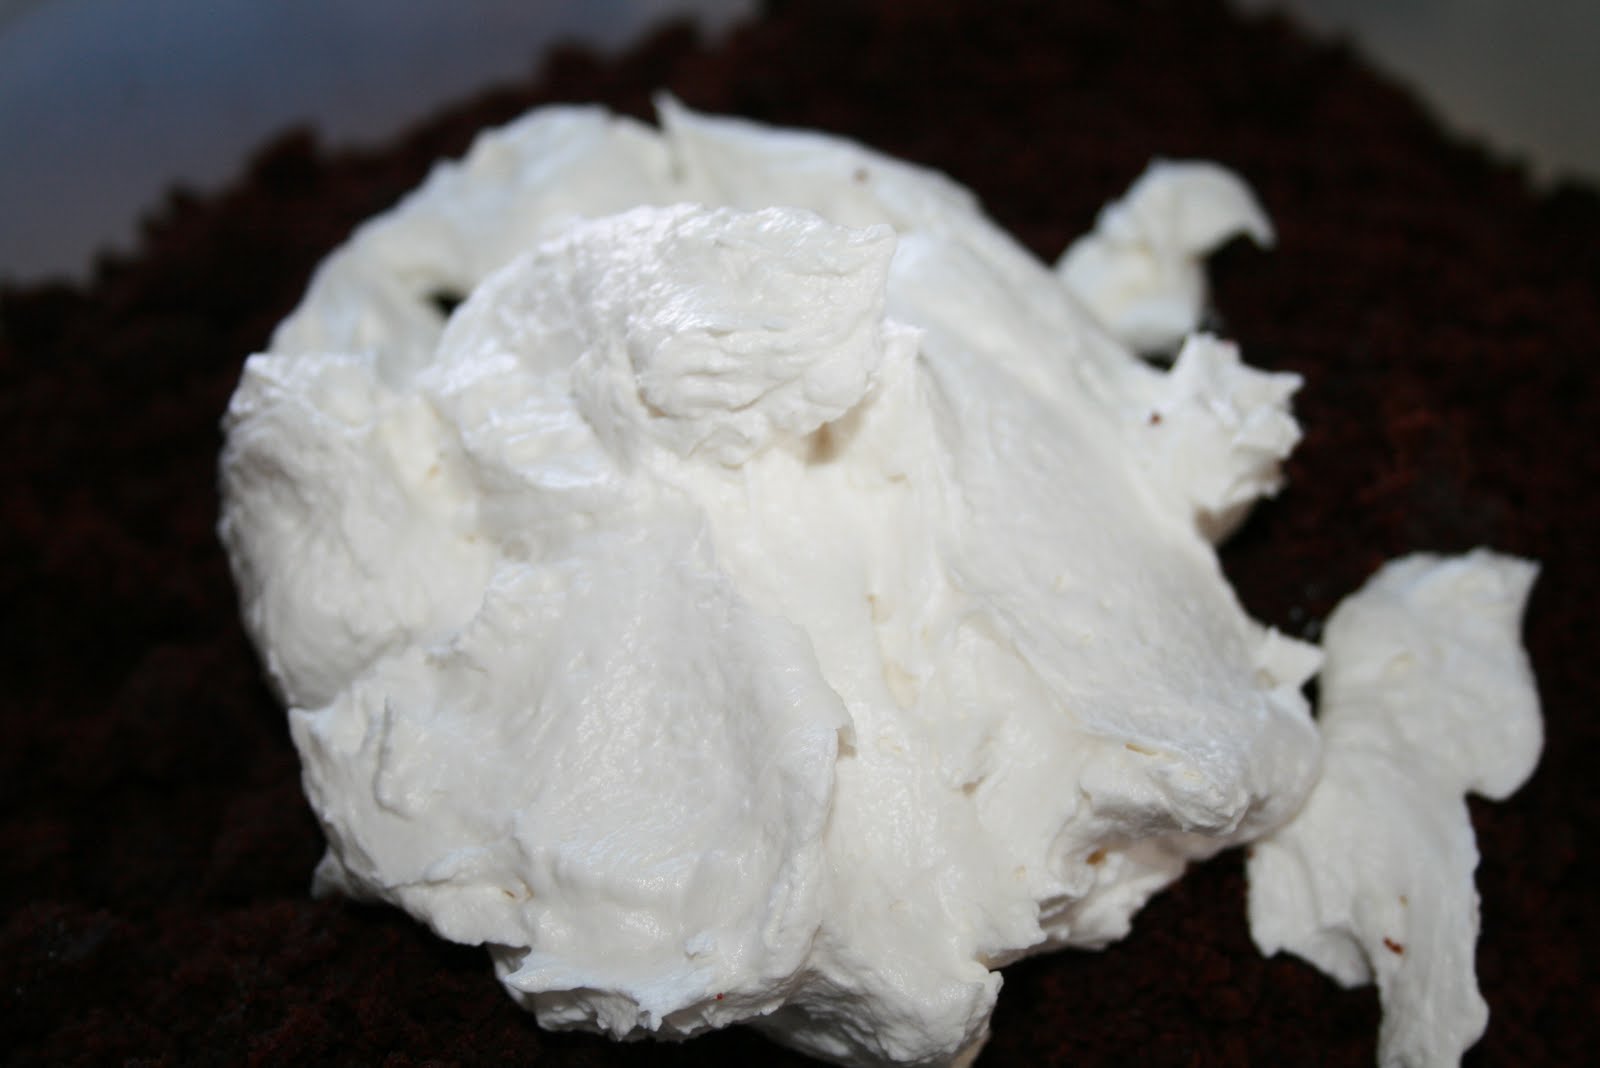
I used Crusting Buttercream Icing:

2 lbs Powdered Sugar
1/2 cups Earth Balance, softened
1 1/2 cups Spectrum Shortening
2 TB Clear Vanilla Extract (Wilton Clear Vanilla)
1/3 cup water OR 1/4 cup for stiffer icing
1/4 tsp. Almond Extract

Cream butter, shorteing and extracts until creamy and smooth.  Gradually add powdered sugar and water.  Mix thoroughly on medium speed for hand mixers, low speed for stand mixers, until smooth and creamy.  Do not overmix or mix on high speed.

Since I wasn't using any white-white icing, I wasn't sorried about the yellow tint that the butter made.  I think you can find untinted in a health food store, but I've never seen it, only heard about it.

I doubled the cake recipe as I needed to make 3 loaf pan cakes.  It was very small.  Be prepared for this to not rise at all, I'm used to cakes that rise just slightly, but this didn't.  It was fine for me, but just an FYI for you.

Betty Crocker has a tutorial on this cake, but again, like the recipe, I'll post it out here so you have it all in 1 place.  Plus I had to make adjustments because we can't have a lot of the extra's they used to make the cake.

First I divided the cake mix into 3 bread pans and baked. Since I only had 1 that was small enough, I had to make in 3 batches but it gave the other time to cool.  I also stored the batter in the fridge while I waited for it to cook.  After all were cooked, I lined them up preparing to cut them to size.  As you can see, the one on the top left has an indent somehow, so I made that the bottom layer.  The bottom left became the cab and that piece was cut in two and the one on the right I cut off about 3" to allow for the center part on the cake.

After I cut them I realized that 1 was cut a bit more than I thought looked right, so I cut a small piece and added it back.  I used frosting to "glue" it together, as I did with the rest of the cake
Here I realize that the edges of the cake are very hard and I hate to lose the little but of cake I have, I decided I needed to cut some off.  So I trimmed off all the edges and then gave it a crumb coat and put it in the freezer to set.
White the cake was freezing, I made the colors I needed for the cake, Red, Grey and black.  Red is extremely hard to make, and I found the longer it sat, the redder it got, so try making some and letting it setup for a bit and then add more.  I used almost an entire bottle of Wilton's Red Red Icing Color plus half of a bottle of red food coloring.  But the color turned out great!

After about 30 minutes, I took the cake out of the freezer and I painted the center piece grey and the rest of it red.  (See how great the red turned out!  Wait til you see it finished, the next day!  It's even redder)

Had I actually thought about it, I would have done the grey first and red next, but I wasn't thinking and I had a heck of a time with it, so my coloring/painting turned out horrible.  Oh well, he's 3 lol  At this point I threw it back into the freezer, let it all get hard and hopefully make it easier to work on.
Now I needed to do the decorations on it.  Betty Crocker says to use Oreo's for wheels and licorice for the hose, neither of which we can have since they are gluten filled, so I had to pipe it all on.  I used the black icing I prepared earlier and piped the wheels and  hose.  Then I used white and made the windows and ladder.  At some point during this process I somehow dropped red onto the grey as you can see, and the more I tried to fix it, the worse it got, so I left it alone. lol
All that was left was the grey to tie it all in together and finally it looked kind of normal lol  I still feel like it was missing something, if I make it again maybe I'll add some black around the windows.

After putting the grey border on and writing I added some red, white and yellow gumdrops.  Well, spice drops cuz I couldnt find actual gumdrops.  I cut off a small amount off the bottom of the gumdrops, stuck them on strategically and it was finally complete! But it wasn't until now that I realized it was crooked lol
See, it's missing something on the front.  I do think adding some black around the windows will close it up and make it look better.  But for now, the 3 year old loved it!

Tuesday, November 29, 2011

Allergy Free Meat Lasagna with Cashew "Ricotta" Cheese

This turned out to be a great Lasagna .  I love mozzarella cheese but since the kids can't have it, I had to use the standby "cheese", Daiya.  I made this lasagna the same as I make all my lasagna's, I just made a few substitutions.  For ricotta cheese , I used Cashew "Ricotta" Cheese, for the mozzarella, I used the Daiya and for Parmesan, I mixed the following:

Parmesan "Cheese"


1/2 c. Blanched Almond Flour
2 tsp. Nutrional Yeast Flakes
1 tsp Salt

Shake and serve :)  Tastes pretty darn good!

Now, onto the lasagna!  I didn't take pictures of the building process, frankly, I was tired of washing my hands, and having to wash my hands, grab the camera, take pic, wash my hands, build the next layer, wash my hands, grab the camera, etc etc,  was really irritating them.  I should have, but I didn't.  maybe next time :)

Ingredients:

Allergy Free noodles, such as Tinkyada Lasagne
Spaghetti sauce (jarred or homemade.  I use homemade)
Cashew Ricotta Cheese
Daiya Mozzarella Cheese
Vegan Parmesan Cheese (recipe above)
9x9 pan

Preheat oven to 350 Degrees

1- Put a small amount of your spaghetti sauce , just enough to cover the bottom. 
2- Put 1 layer of Lasagna noodles on top of sauce
3- Scoop ricotta cheese on top of noodles (thickness is your choice.  Some people like it cheesy, some don't)
4 - Spoon Spaghetti Sauce on top of cheese
5 - Repeat 1-4 until you reach the top of the pan.  It usually takes about 3 layers.  On the top layer, skip #3, do NOT add the Ricotta cheese, jump to #4 and put the sauce on top of the noodles.
6 - On top of the sauce add your Mozzarella Cheese
7 - Sprinkle Parmesan cheese on top of the Mozzarella Cheese


Bake at 350 deg for approximately 45 minutes.  As you can see, the Daiya cheese doesn't spread so make sure you add a lot all over.

Cut and serve :)

WOW! It's been so long! How about a Cashew "Ricotta" Cheese recipe for the allergy free lasagna recipe I'll post next

Wow, has it really been 6 months since my last post! So much has been going on! I make sure to take pictures of everything I make, I have loads of them, but no time to actually post here. I need to get started again. So, I'll start here. After eating turkey and ham for days, I decided we needed to have something different. I have been dieing for some Italian food, so was the ticket. Being Italian, Italian is always my comfort food. And since my mother just passed away on October 20, 20011, from the lymphoma I posted about 11 months ago, comfort was what I needed.

The first challenge is always the cheese. What is lasagna without Ricotta cheese! Well, it's pretty good it turns out!

Cashew "ricotta" cheese

1 lb cashews
approx 2 cup of water (enough to cover the cashews plus enough extra to allow for the swelling of the cashews.)
3/4 c. water
1/16 tsp salt
1/16 tsp nutmeg
dash of lemon juice
pinch of parsley and basil or Italian Seasoning (optional, I did not use it but I think I will next time)

Allow cashews to soak overnight. Drain and blend. I use my vitamix and put them all in, but if you use a food processor, or a less powerful blender, put in n small batches.


Blend til smooth then add water, salt, nutmeg and lemon juice and blend to combine.

This is the final product.  Put n container and you can freeze it or use it for the lasagna or other Italian comfort food.


Read my next post for my lasagna Recipe :)

Friday, May 27, 2011

Allergy Free Chicken Parmesan

Well, last minute idea tonight for supper, Chicken Parmesan.  Didn't really want spaghetti, and I hadn't thawed out my Italian sausage but I really wanted something "Italian", and then it hit me, Chicken Parm!! YUM!

Breading is always a challenge when doing GF cooking, but the fall back for me is always EnerG. But the last time I bought some, I decided to try the OrgraN Brand.  Not real fond of them, to be honest.  I prefer EnerG.  But now I have a lot of OrgraN so need to use them up.  What a perfect way to do so with Chicken Parm!

To give a bit of flavor and nutrition (as though Chicken doesn't have enough) I used a bit of Almond Meal.  
 And added in about equal parts of the bread crumbs
 Then mixed in Italian Seasoning, Sea Salt and Pepper.
 Dipped the chicken in almond milk and then the bread crumb mixture

 Then put them in dish and baked in a 350 deg preheated oven until done.  Usually it will take about 45 min - 1 hr, but these were small, thick breasts that I cut in half to make 2 out of 1 so it took a shorter amount of time to cook.
 
What I don't like about it is that it doesn't get "brown" .  It's still done, and just as good, but my brain tells me it should be brown, so I keep thinking the chicken is not done.

Now I turn the oven to broil, add the Daiya Mozz Shreds
 and move the chicken to the top rack, broiling for about 10 minutes. 
 You have to be careful with this "cheese".  I got distracted and didn't keep my eye on it and came back to it being burnt.  You can see the burnt spot on the chicken, I didn't peel it all off as I wasn't too worried with it, I kinda like it a little burnt.  The good news about this cheese and that it peels off, so I just peeled it off and added fresh and re-broiled.  But be careful, if it is not done "just right" it can taste a bit funny.  Unlike regular cheese, I personally don't find it tasty enough to eat out of the bag, at least not the mozz.  So uncooked is not tasty at all. 

I typically use Quinoa noodles but I had 2 bags of EnerG rice noodles from before I found the Quinoa decided to use those up.  After I drained it, it glued together and I had to tear apart chunks of noodles to put on the plates.  (Bad call, but at least now I'm only down to 1 bag :) The sauce softened it up again but I cooked it too long and it became a mess.
You can see the black from the original burnt cheese but can also see the white strings of the Daiya cheese.  Unlike regular cheese, it doesn't melt and spread, it stays exactly the way you put it, as you can probably see it still clumped.

Last week I ran across a recipe for "Parmesan Cheese" that used Almond Meal, Nutritional Yeast and Salt as a substitute.  So I mixed together 1/2 c. Almond Meal, 1TB Nutritional Yeast and 1 tsp salt.  I can't find the original website to link to it, I just wrote down what I needed, Maybe someone will have seen it and let me know so I can give them the credit.

Again, as with the fake cheese, it doesn't taste like regular Parm Cheese but it wasn't bad.  The young-in's like it.   Store it in the fridge, I put it in a glass jar.  Don't remember how long they said it would hold up but I imagine a month or 2.
ENJOY!

Allergy Free (GF/DF/CF/EF) (possibly Vegan) Bread

I have made a spin-off of different bread recipes many times.  Most recipes though call for plain rice flours and starches which add very little nutrition to them.  I figure since we are cutting out so many things, I need to add as much nutrition in them as I can, so I have adjusted flours in incorporate some that have nutrition in them.  There is still a lot of starch and rice flour, and I will be working on that some more so that I can cut that down, but for now, this is what I have had work.  With the elimination of eggs, I think this may also be Vegan.  Something, that apparently, that I have to cook without knowing it.  We are eating meat, but as for any recipes for baking, I have to search for Vegan recipes.

If you are vegan and reading this, please let me know if this is indeed, Vegan.

Ingredients:

1 1/4 c. white rice flour
1/2 c. sorghum flour
1/2 c. buckwheat flour
1/4 c. garbanzo bean flour
1 c. tapioca flour
1 c. sweet rice flour *
 4 tsp. xanthan gum
2 TB Baking powder
1 1/2 tsp salt
4 TB sugar

1-1/2 c. warm (105-110 deg) water or milk (I use water)
1 TB sugar
2 TB active dry yeast

3 TB vinegar**
3 tsp baking soda**

1 TB apple cider vinegar
1/4 c. + 2 TB Olive oil
1/2-3/4 c. (your choice of) milk - I used almond milk (adjust as needed)

*I have also made this without the Sweet Rice Flour and it turned out just as good.  I just used another 1/2 c. tapioca flour and 1/2 c. white rice flour in place of the Sweet Rice.
**The vinegar and baking soda replaces the eggs in the original recipe

Preheat oven to 375 deg. Oil and flour pan.  I use a 9 1/4 x 5 1/4 pan.  Remember this makes 4 1/2 c. so you'll want to use a bigger pan.

In small bowl, proof yeast by whisking together warm water (or milk) and 1 TB sugar.  Then add 2 TB yeast and mix until dissolved.  Set aside to foam.  If it does not foam, your yeast is bad and try again.

In separate bowl, whisk together the flours, xanthan gum, Baking powder, salt and remaining 4 TB sugar, set aside.

In large bowl (I use my mixer bowl) mix together 3 TB Vinegar and Baking Soda.  (I usually add the Apple Cider Vinegar now as well so that there is only the 1 reaction instead of 2, but that is up to you.)

Mix in 1TB Apple Cider vinegar (if not done in step above), Olive oil and 1/2 c of milk.  Mix until combined.

Add in Yeast mixture, mixing about 30 seconds until all combined.

Add dry ingredients and mix until well combined.  Slowly add the remaining 1/4c of milk to the mixture as needed.  (For me, some days I need the entire 1/4 c plus a little more, and others I dont need any of it.  Funny how GF breads work!)

Mix dough for approximately 2 minutes on "stir" or 2 speed if using Kitchen Aid.


Pour into bread pan...
and let rise for approximately 30-40 minutes, or until it rises just slightly above the top of bread pan.  If, after 45 minutes, it doesnt rise that high, put it in the oven.  I've had some days where that happened and I can't figure out why.  This happened to be one of those days.
Bake for approximately 45 minutes, checking the temp of the bread after 40. You want the internal temperature to be about 208 degrees.  If you notice the bread getting to dark, cover with foil.  Getting the internal temp to above 200 will help eliminate the doughy center.

Remove from oven and let cool. 
Enjoy :)

Monday, May 23, 2011

Gluten Free, Soy Free, Casein Free Chocolate Cake Pops

Oh, so many things made but nothing blogged.  Time hasn't allowed it. I have a hundred pics of foods I've made, maybe one day I'll get them on here.

However, I did want to get these up. I am not finished with them yet but wanted to get what I have done and if I don't get back to it today, I can always update with the finished pics later.

I saw a post last week about Cake Pops.  They intrigued me.  With having to make a cake at every school event, I am trying to be creative instead of sending in the same thing every time.  So I thought, wth, I'll give these a shot.  They are easy to make but take a lot of time and steps to do it.

If you're familiar with GF cake mixes, you know that to make a normal size cake you have to double the recipe.  I never understood why that is.  Why not just make a recipe for what everyone considers "normal".  Oh well, either way, the chocolate cake recipe I used today is been the best tasting recipe I've made.  I know everyone says that their non-gf friend/family/spouse says it tastes like normal.  I must be doing something wrong because when I made them, no one I know thinks so.  THIS recipe, however, to me, DOES taste like normal and my family and school kids also think so.  Tho I imagine the 1st graders don't count, as all sweets are awesome lol

I don't have original recipes, and I don't have the authors permission so I hope that by  posting where I got it from, that will suffice.

From the cookbook:  Special Diets for Special Kids - Two  by Lisa Lewis
Lisa Ackerman's Chocolate Cake

I doubled the recipe to make a 9x13 cake, this is the doubled recipe:
  • 2 cups white rice flour
  • 1 cup sorghum flour
  • 2 cups sugar
  • 1 cup cocoa powder
  • 1 teaspoon salt
  • 2 teaspoons baking soda
  • 2 teaspoons xanthan gum
  • 1cup oil
  • 1 cup milk substitute (I used Almond milk)
  • 1 cup hot water
  • 4 teaspoons vanilla
Preheat to 350.

Mix together dry and stir to combine.  then add liquid ingredients and stir until well mixed.

Pour better into greased and floured 9x13-inch cake pan and bank approximately 40 minutes. Longer if needed to pass clean toothpick test.  (I forgot to write down how long it took before it was done but I originally set the timer for 35 min, then again for 7 min, I think.)

When the cake was done, I let it cool for 10 minutes then removed from pan and let it cool completely.

Once cooled, break cake apart, I found it easiest to do with my hands, breaking apart until it was a big crumbly mess.

(oops, I forgot to take a pic before I added the icing)

I then made the following icing from The Allergen-Free Baker's Handbook  by Cybele Pascal
  • 1 cup dairy-free, soy-free vegetable shortening  (I used Palm Shortening)
  • pinch of salt
  • 3 cups confectioners’ sugar
  • 1/4 cup rice milk (I used Almond Milk)
  • 1/2 teaspoon pure vanilla extract
1. In the bowl of stand mixer, cream shortening and salt on medium speed for about 1 minute.
2. Add the sugar, milk and vanilla. Beat until smooth and fluffy, about 5 minutes. 

From here, add the icing into the cake crumbs and mix until the icing is all mixed in. 


Then roll into small balls and freeze for about an hour.  This yielded 54 balls.  I should have made some of them slightly smaller, I think. 

Now here is where I ran into a problem.  The coach called and they are having a last minute T-ball practice in 30 min, so I had to take them out of the freezer, because they can't be frozen, and now it's too late to decorate them tonight.  So I'm gonna hope that they stay ok and I can finish them in time in the morning.  I will update this after they are finished.
------------------------------------------------------------------------------------
May 24 - Ok, so I decided to put the cake balls into the fridge last night to stay cold.  They were fine in there overnight.  If anything, I should have put them in the freezer again before finishing them this morning, as they needed to be colder but I was very short on time.  

I used 1 1/2 bags of  Enjoy Life GF/DF/SF Mini Chocolate Chips, added 1 1/2 - 2 TB oil (I prefer grapeseed) and melted them in the microwave in 15 second intervals, stirring after each 15 seconds.  The general guideline is 1 TB per bag of chips, but I don't know if it is because these chips have different ingredients or not, but it seemed very thick, the extra 1/2-1 TB oil seemed to smooth and thin it out much nicer.  

Be sure the bowl is deep enough that you can cover the balls.  I left some chips unmelted completely and used the melted chocolate to melt the unmelted chips as I didn't want it burnt.  (huh???? lol)


The Cake Balls have a flat spot on the bottom from sitting and resting in the pan, 
So I used this end to put the sticks in them.  I wasn't sure what size sticks to get, I thought the 6" Wilton Popsicle Sticks would be a good size but they were too big to fit in my container, so I cut about 2" off of them so they would fit in my carrier.
  To prepare the sticks, dip them in the chocolate, about 1/2"-1" (this picture shows a less amount that what was needed, I ended up redipping)
Insert the stick into the cake balls, approximately 1/2 way, making sure the chocolate is coming out the bottom
Then dip the ball into the chocolate, as you can see, my bowl was deep enough but I could have used more chocolate in it to cover it.  Instead, leaving the ball centered, I moved the stick back and forth so that the chocolate would cover the ball completely.
I came across a problem here, the first cake ball was coming off the stick.  I know the problem was that they weren't cold enough, and needed to go back into the freezer but I didn't have the time to do that. So for the rest of the pops I put them on the stick and spooned it over the balls.  I did stop 1x (out of 40 balls) to stick them in the freezer for 15 min, and that made things so a lot more smoothly, they stayed on the stick a lot better.  But next time I will probably do it for every 10 balls or so, of if possible, leave them in the fridge and take them out 1 at a time.  Make sure you hold the sticks over the bowl to drain off a bit.  Lightly tapping the stick helps the drips.  Be sure you get plenty of chocolate around the bottom of the ball where it meets the stick, this helps to hold them in place.
Next I added the sprinkles
I used a 12"x1" piece of Styrofoam circle, it fit perfectly into my container but I had a horrible time trying to get the pops to stay upright.  I never did figure out how to keep them upright so eventually just made 20 pops and 20 balls.
I put plastic wrap over the foam so I could use it again.  But you can clearly see they didn't stand upright.
Here is the final product, hanging every which way

And the rest were cake balls
The kids and adults alike all loved them and wanted 2nds.  No one knew or believed they were GF/SF/CF